Published: Jul 7, 2021 by BeatChoi
스크립트 생성
이전 프로젝트를 열고 ObjectPlacement.cs 스크립트를 생성하여 다음과 같이 작성합니다.
아래 스크립트는 이전 Touch Object Placement 포스트를 참조하면 좋습니다.
Touch Object Placement 포스트
이전과 다른점은 지면 인식 표지기가 존재한다는 점과 터치시 오브젝트 생성을 위한 함수가 작성되어있습니다.
1
2
3
4
5
6
7
8
9
10
11
12
13
14
15
16
17
18
19
20
21
22
23
24
25
26
27
28
29
30
31
32
33
34
35
36
37
38
39
40
41
42
43
44
45
46
47
48
49
50
51
52
53
54
55
56
57
58
59
60
61
62
63
64
65
66
67
68
69
70
71
72
73
74
75
76
77
78
79
80
81
82
83
84
85
using System.Collections;
using System.Collections.Generic;
using UnityEngine;
using UnityEngine.XR.ARFoundation;
using UnityEngine.XR.ARSubsystems;
using UnityEngine.UI;

public class ObjectPlacement : MonoBehaviour
{
    public static ObjectPlacement Instance;

    private ARRaycastManager raycastManager;
    private Pose placementPose;
    private bool placementPoseisValid;
    private bool isObjectPlaced;

    public GameObject positionIndicator;
    public GameObject[] prefabToPlace;
    public Camera ARCamera;

    public Text txt;
    private GameObject PlacedObj;

    [HideInInspector]
    public string qrcode;

    private void Awake()
    {
        Instance = this;
        raycastManager = GetComponent<ARRaycastManager>();
    }
    // Start is called before the first frame update
    void Start()
    {
        GetComponent<ObjectPlacement>().enabled = false;
    }

    // Update is called once per frame
    void Update()
    {
        if (!isObjectPlaced)
        {
            UpdatePlacementPose();
            if (placementPoseisValid && qrcode != "") PlaceObject(qrcode);
            {

            }
        }
    }

    private void UpdatePlacementPose()
    {
        var screenCenter = ARCamera.ViewportToScreenPoint(new Vector3(0.5f, 0.5f));
        var hits = new List<ARRaycastHit>();

        raycastManager.Raycast(screenCenter, hits, TrackableType.All);
        placementPoseisValid = hits.Count > 0;

        if (placementPoseisValid)
        {
            placementPose = hits[0].pose;
            var cameraForward = ARCamera.transform.forward;
            var cameraBearing = new Vector3(cameraForward.x, 0, cameraForward.z).normalized;

            placementPose.rotation = Quaternion.LookRotation(cameraBearing);
            positionIndicator.SetActive(true);
            positionIndicator.transform.SetPositionAndRotation(placementPose.position, placementPose.rotation);
        }
        else
        {
            positionIndicator.SetActive(false);
        }
    }

    private void PlaceObject(string qrcode)
    {
        if (qrcode == "Object")
        {
            PlacedObj = Instantiate(prefabToPlace[0], placementPose.position, placementPose.rotation);
            txt.text = "오브젝트가 생성되었습니다!";
        }
        isObjectPlaced = true;
    }
}
그리고 ReadQRCode.cs 스크립트를 열어 다음과 같이 수정합니다.
SetObject 함수와 해당 함수의 호출부만 추가하면 됩니다.
1
2
3
4
5
6
7
8
9
10
11
12
13
14
15
16
17
18
19
20
21
22
23
24
25
26
27
28
29
30
31
32
33
34
35
36
37
38
39
  .
  .
  .
    void Update()
    {
        if(CameraManager.TryAcquireLatestCpuImage(out XRCpuImage image)){
            using (image)
            {
                var conversionParams = new XRCpuImage.ConversionParams(image, TextureFormat.R8, XRCpuImage.Transformation.MirrorY);
                var dataSize = image.GetConvertedDataSize(conversionParams);
                var grayscalePixels = new byte[dataSize];

                unsafe
                {
                    fixed (void* ptr = grayscalePixels)
                    {
                        image.Convert(conversionParams, new System.IntPtr(ptr), dataSize);
                    }
                }

                IBarcodeReader barcodeReader = new BarcodeReader();
                var result = barcodeReader.Decode(grayscalePixels, image.width, image.height, RGBLuminanceSource.BitmapFormat.Gray8);

                if(result != null)
                {
                    txt.text = result.Text;
                    SetObject();                //함수 호출 추가
                }
            }
        }
    }


    void SetObject() //오브젝트 생성 함수
    {
        GetComponent<ObjectPlacement>().enabled = true;
        ObjectPlacement.Instance.qrcode = "Object";
    }
}
에디터에서
계층구조창에서 3D 오브젝트 하나를 생성합니다. 간단하게 Cube 오브젝트로 실행하겠습니다.
그리고 해당 Cube 오브젝트를 Prefab화 시켜줍니다.
계층구조창에 남은 Cube 오브젝트는 제거합니다.
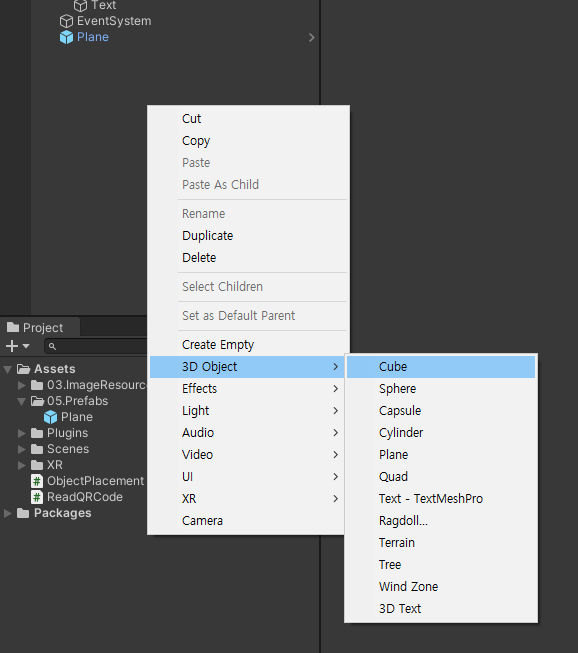
<01. Cube 생성>
Position Indicator 오브젝트를 생성해 주도록 하겠습니다.
이전 포스트의 이미지를 동일하게 사용하여 Prefab으로 만들어 주겠습니다.
<02. Position Indicator>
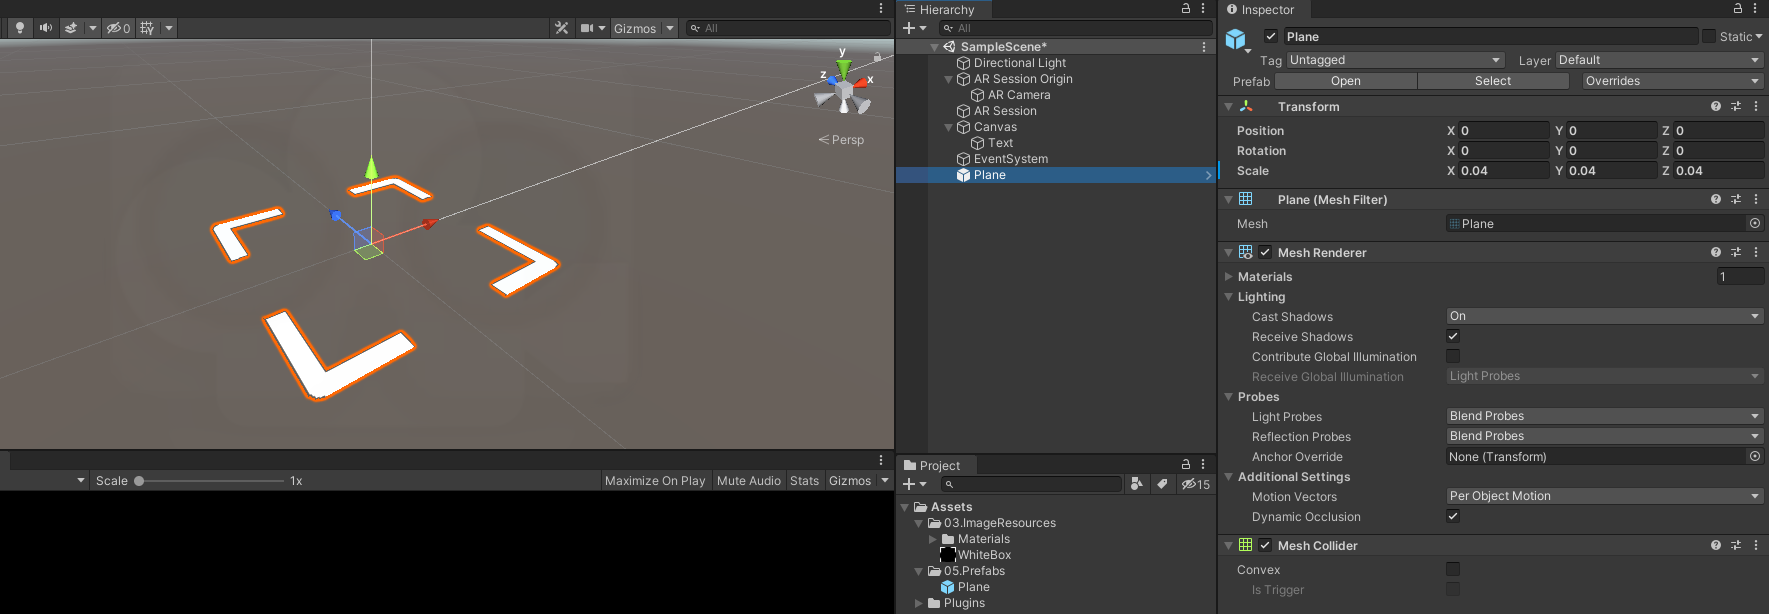
계층구조창의 ARSessionOrigin 오브젝트에 ObjectPlacement.cs 스크립트를 인스턴스화합니다.
Position Indicator 란에는 지면 인식시 표현이 될 표지기를 연결합니다.
Prefab to Place 란에는 Project 창의 Cube prefab을 연결합니다.
ARCamera 란에는 AR Session Origin의 하위 오브젝트의 ARCamera를 연결합니다.
Txt 항목에는 Txt 오브젝트를 연결합니다.
<02. ObjectPlacement 스크립트 인스턴스화>
빌드 하기
다음과 같이 안드로이드 빌드를 위한 세팅을 마친 후 APK 빌드를 하여 안드로이드 디바이스에서 확인합니다.

<10. 빌드 세팅>
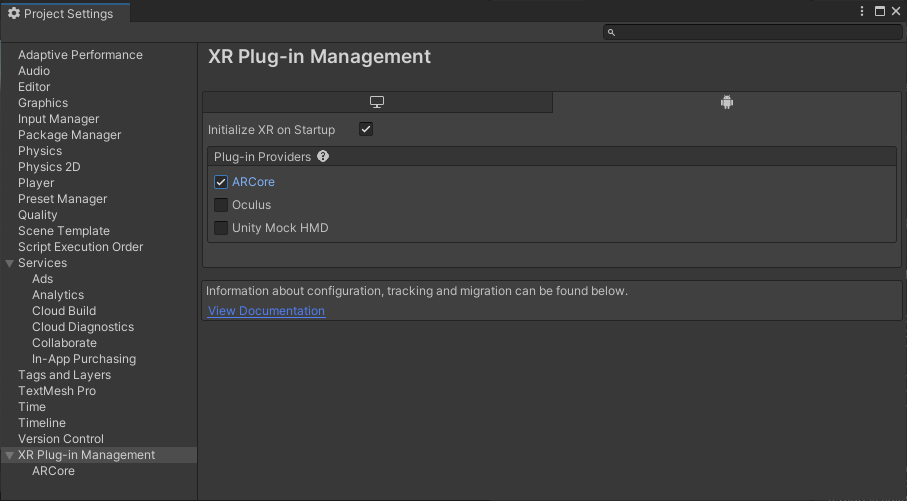
<11. 빌드 세팅>
테스트
빌드를 한 뒤 안드로이드 디바이스에 설치하여 해당 어플리케이션을 실행시킵니다.
카메라가 켜지면 QR코드를 인식시켜보고 가운데 텍스트에 QR의 데이터가 출력되는지 확인합니다.
그후 지면을 인식시켜 Indicator 가 나오는지 확인하고 스크린을 터치하면 해당 위치에 Cube 오브젝트가 생성됩니다.