Published: Apr 3, 2023 by BeatChoi
LightshipAR SDK
포켓몬고의 개발사로 잘 알려진 Niantic에서 제공하는 증강현실 SDK 입니다.
기본적으로 포켓몬고에 적용되는 기능들을 구현할 수 있으며 기본적인 지면인식, 공간인식을 포함하여
지오펜싱을 활용한 GPS기반 위치인식, 환경 세그멘테이션 등의 기능들을 활용할 수 있습니다.
이번 강좌에서는 지면을 인식하여 해당 위치에 객체를 생성해 보겠습니다.
콘텐츠 개발
프로젝트 세팅
이전 포스팅인 LightshipAR 프로젝트 세팅를 참조하여 세팅합니다.
씬 세팅
빈 게임 오브젝트를 생성한 후 이름을 ARSession으로 변경합니다.
해당 오브젝트에 ARSessionManager.cs, CapabilityChecker.cs, AndroidPermissionRequester.cs 컴포넌트를 부착합니다.
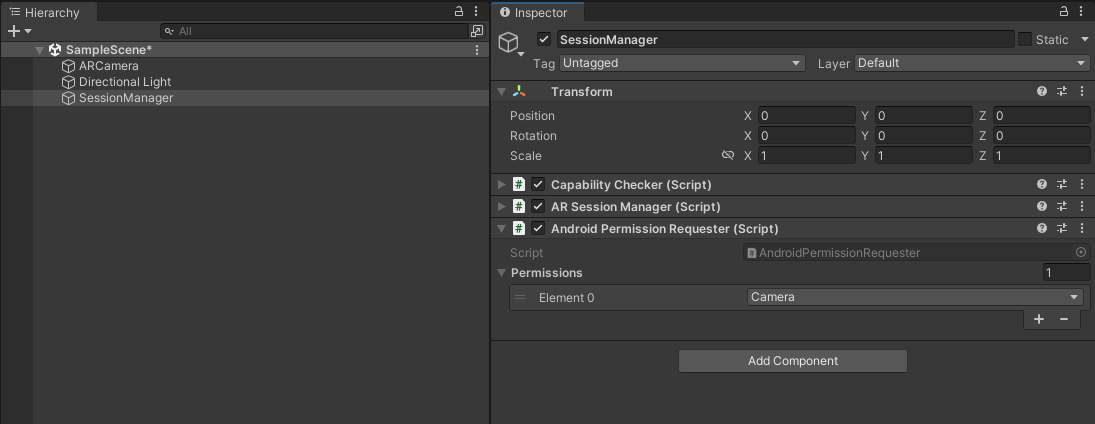
<01. ARSession 오브젝트 생성 >
Main Camera 오브젝트의 이름을 ARCamera로 변경하고
ARCameraPositionHelper.cs, ARRenderingManager.cs스크립트를 추가합니다.
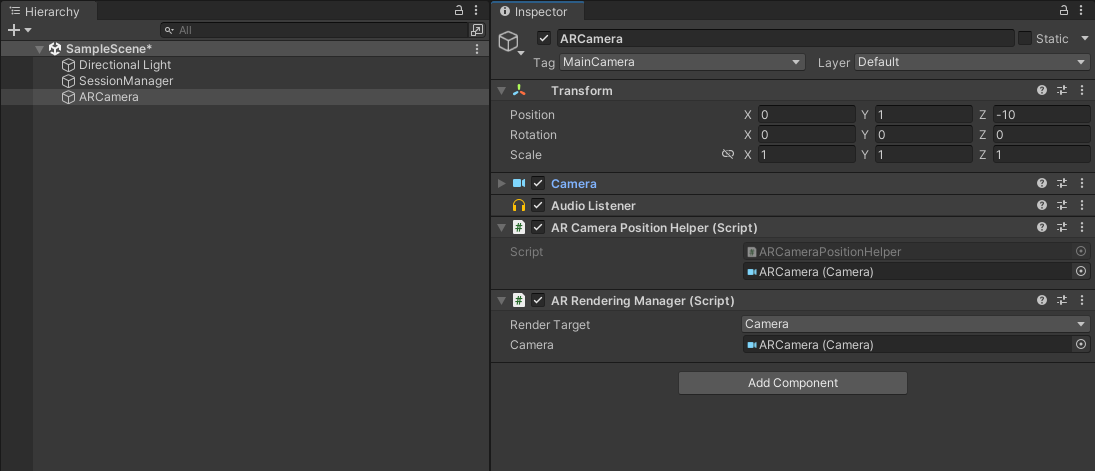
<02. ARCamera 오브젝트 생성 >
ARPlaneDetector.cs스크립트를 생성합니다.
그리고 다음과 같이 스크립트를 작성합니다.
1
2
3
4
5
6
7
8
9
10
11
12
13
14
15
16
17
18
19
20
21
22
23
24
25
26
27
28
29
30
31
32
33
34
35
36
37
38
39
40
41
42
43
44
45
46
47
48
49
50
51
52
53
54
55
56
57
58
59
60
61
62
63
64
65
66
67
68
69
70
71
72
73
74
75
76
77
78
79
80
81
82
83
84
85
86
87
88
89
90
91
92
93
94
95
96
97
98
99
100
101
102
103
104
105
106
107
108
109
110
111
112
113
114
115
116
117
118
119
120
121
122
123
124
125
126
127
128
129
130
131
132
133
134
135
136
137
138
139
140
141
142
143
144
145
146
147
148
149
150
151
152
153
154
155
156
157
158
159
160
161
162
163
164
165
166
167
168
169
170
171
172
173
174
175
176
177
178
179
180
181
182
183
184
185
186
187
188
189
190
191
192
193
194
195
196
197
198
199
200
201
202
203
204
// Copyright 2022 Niantic, Inc. All Rights Reserved.

using System.Collections;
using Niantic.ARDK.AR;
using Niantic.ARDK.AR.ARSessionEventArgs;
using Niantic.ARDK.AR.HitTest;
using Niantic.ARDK.Utilities;
using Niantic.ARDK.Utilities.Input.Legacy;
using UnityEngine;

public class ARPlaneDetector : MonoBehaviour
{
    /// The camera used to render the scene. Used to get the center of the screen.
    public Camera Camera;
    /// The object we will place to represent the cursor!
    public GameObject CursorObject;
    //public GameObject PlacementObjectPf;

    /// A reference to the spawned cursor in the center of the screen.
    private GameObject _spawnedCursorObject;

    private IARSession _session;
    [SerializeField]
    private GameObject ObjectToSpawn;

     void Start()
    {

        ARSessionFactory.SessionInitialized += _SessionInitialized;


    }
    private void OnDestroy()
    {
        ARSessionFactory.SessionInitialized -= _SessionInitialized;

        var session = _session;
        if (session != null)
            session.FrameUpdated -= _FrameUpdated;

        DestroySpawnedCursor();
    }

    private void DestroySpawnedCursor()
    {
        if (_spawnedCursorObject == null)
            return;

        Destroy(_spawnedCursorObject);
        _spawnedCursorObject = null;
    }

    private void _SessionInitialized(AnyARSessionInitializedArgs args)
    {
        var oldSession = _session;
        if (oldSession != null)
            oldSession.FrameUpdated -= _FrameUpdated;

        var newSession = args.Session;
        _session = newSession;
        newSession.FrameUpdated += _FrameUpdated;
        newSession.Deinitialized += _OnSessionDeinitialized;


    }

    private void _OnSessionDeinitialized(ARSessionDeinitializedArgs args)
    {
        DestroySpawnedCursor();
    }

    private void _FrameUpdated(FrameUpdatedArgs args)
    {
        var camera = Camera;
        if (camera == null)
            return;

        var viewportWidth = camera.pixelWidth;
        var viewportHeight = camera.pixelHeight;

        // Hit testing for cursor in the middle of the screen
        var middle = new Vector2(viewportWidth / 2f, viewportHeight / 2f);

        var frame = args.Frame;
        // Perform a hit test and either estimate a horizontal plane, or use an existing plane and its
        // extents!
        var hitTestResults =
            frame.HitTest
            (
            viewportWidth,
            viewportHeight,
            middle,
            ARHitTestResultType.ExistingPlaneUsingExtent |
            ARHitTestResultType.EstimatedHorizontalPlane
            );

        if (hitTestResults.Count == 0)
            return;

        if (_spawnedCursorObject == null)
            _spawnedCursorObject = Instantiate(CursorObject, Vector2.one, Quaternion.identity);

        // Set the cursor object to the hit test result's position
        _spawnedCursorObject.transform.position = hitTestResults[0].WorldTransform.ToPosition();

        // Orient the cursor object to look at the user, but remain flat on the "ground", aka
        // only rotate about the y-axis

        _spawnedCursorObject.transform.LookAt
        (
            new Vector3
            (
            frame.Camera.Transform[0, 3],
            _spawnedCursorObject.transform.position.y,
            frame.Camera.Transform[2, 3]
            )
        );
    }

    private void Update()
    {
        if (_session == null)
        {
            return;
        }

        if (PlatformAgnosticInput.touchCount <= 0)
        {
            return;
        }

        var touch = PlatformAgnosticInput.GetTouch(0);
        if (touch.phase == TouchPhase.Began)
        {
            TouchBegan(touch);

            //if Cursor removes after touch
            /*
            ARSessionFactory.SessionInitialized -= _SessionInitialized;

            var session = _session;
            if (session != null)
                session.FrameUpdated -= _FrameUpdated;*/
        }
    }


    private void TouchBegan(Touch touch)
    {
        var currentFrame = _session.CurrentFrame;
        if (currentFrame == null)
        {
            return;
        }

        var camera = Camera;
        if (camera == null)
            return;

        var viewportWidth = camera.pixelWidth;
        var viewportHeight = camera.pixelHeight;

        // Hit testing for cursor in the middle of the screen
        var middle = new Vector2(viewportWidth / 2f, viewportHeight / 2f);


        var results = currentFrame.HitTest
        (
          Camera.pixelWidth,
          Camera.pixelHeight,
          middle,
          ARHitTestResultType.ExistingPlaneUsingExtent |
            ARHitTestResultType.EstimatedHorizontalPlane
        );

        int count = results.Count;
        Debug.Log("Hit test results: " + count);

        if (count <= 0)
            return;

        // Get the closest result
        var result = results[0];

        var hitPosition = result.WorldTransform.ToPosition();

        Instantiate(ObjectToSpawn, hitPosition, Quaternion.Euler(0, Camera.main.transform.eulerAngles.y, 0));

        var anchor = result.Anchor;
        Debug.LogFormat
        (
          "Spawning cube at {0} (anchor: {1})",
          hitPosition.ToString("F4"),
          anchor == null
            ? "none"
            : anchor.AnchorType + " " + anchor.Identifier
        );
    }

}
해당 스크립트를 ARCamera오브젝트에 인스턴스화 시켜줍니다.
그리고 ARCamera오브젝트에 ARPlaneManager.cs컴포넌트를 추가합니다.
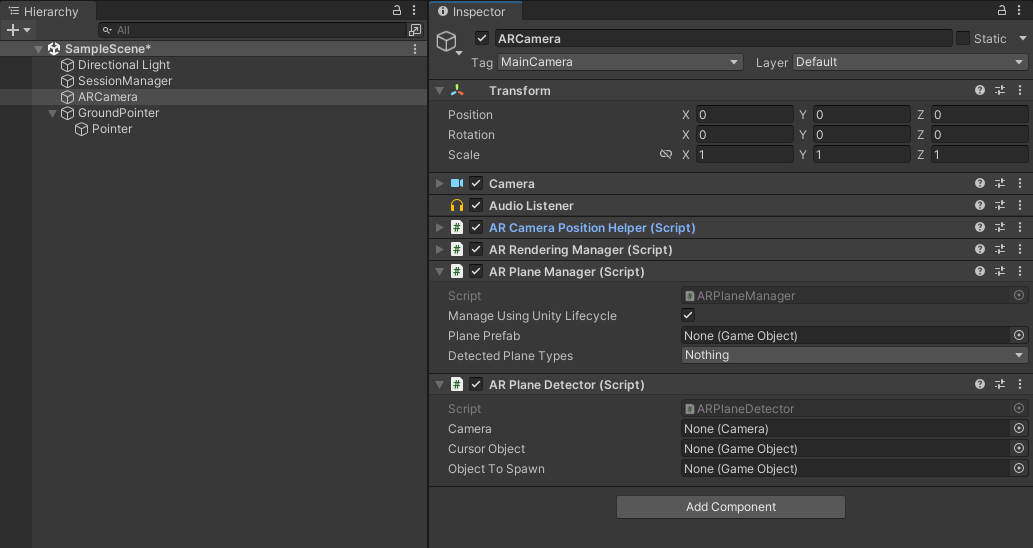
<03. ARPlaneDetector.cs 스크립트 추가 >
지면이 인식되는 위치를 표현하는 표시기를 만들어 프리펩으로 생성합니다.
해당 표지기는 UI Image로 만들거나 Plane, Quad 등 평면 2D 객체로 만들면 됩니다.
본 글에서는 GroundPointer라는 빈 게임 오브젝트를 생성하고 하위에 빈 게임 오브젝트를 생성, Sprite Renderer 컴포넌트를 추가합니다.
Sprite Renderer의 Sprite 항목에 White Circle 이라는 스프라이트를 선택합니다.
해당 오브젝트를 프리펩화 시켜줍니다.
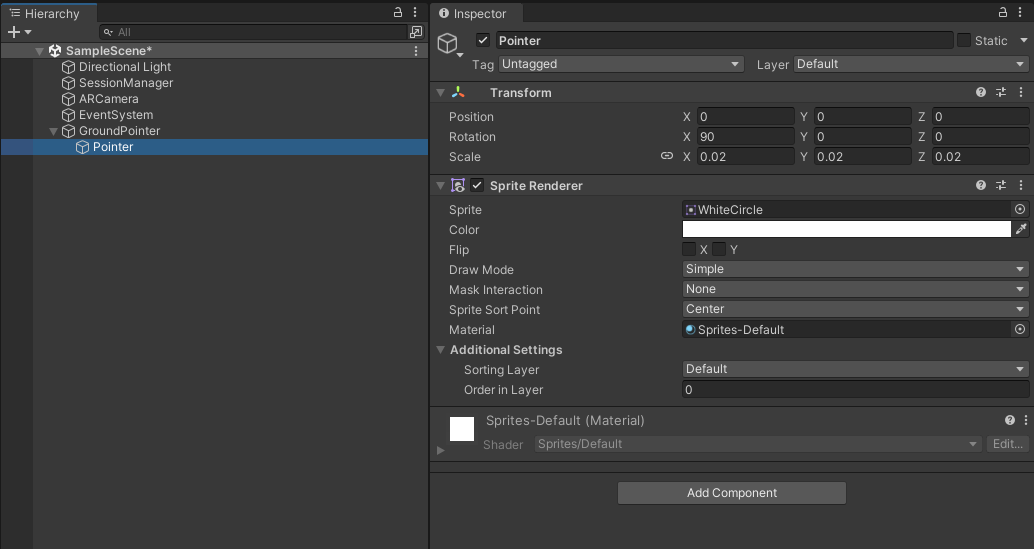
<04. 포인터 오브젝트 생성 >
터치를 하면 생성될 오브젝트를 만들어 줍니다.
본 글에서는 기본 큐브로 진행합니다.
큐브 오브젝트를 생성하고 프리펩으로 만들어 줍니다.
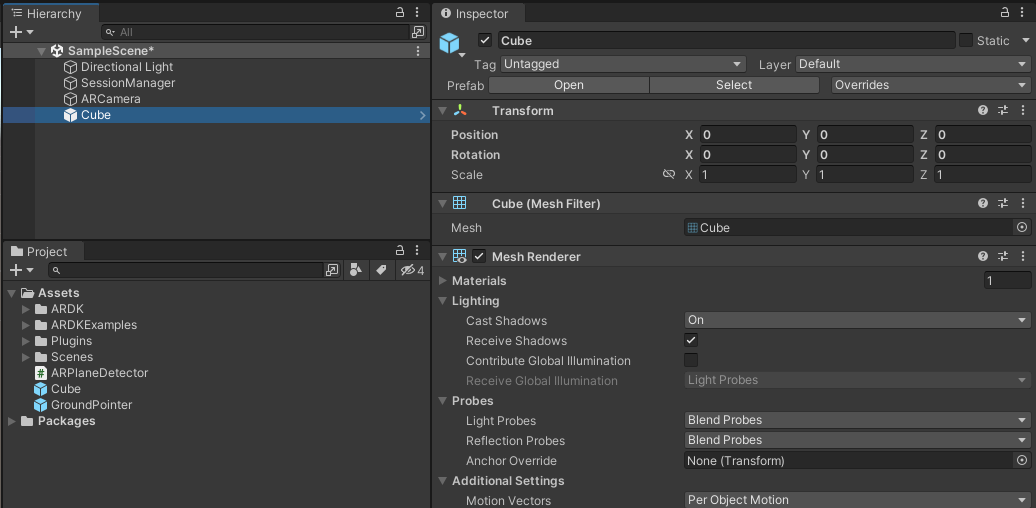
<05. 큐브 프리펩 생성 >
ARCamera 오브젝트의 ARPlaneDetector컴포넌트의 Camera 항목에 ARCamera를,
CursorObject 항목에 GroundPointer 프리펩을, ObjectToSpawn 항목에 Cube 프리펩을 지정합니다.
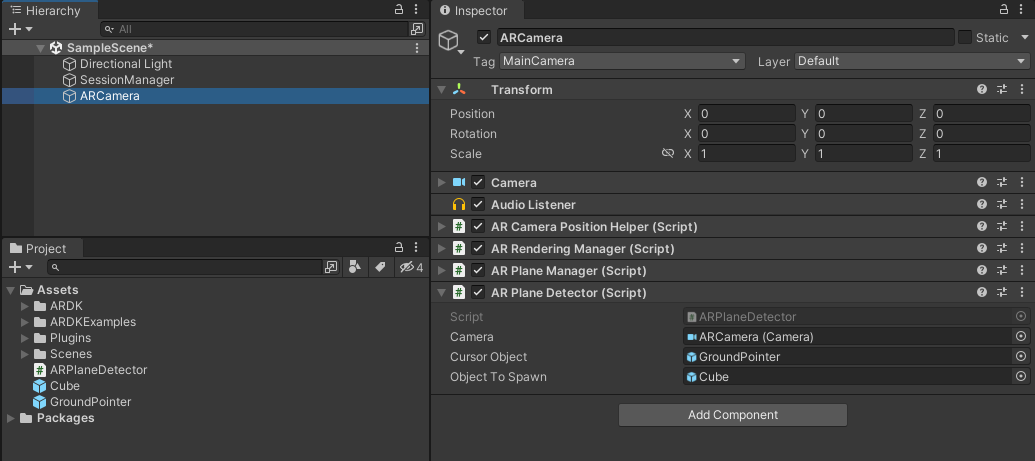
<06. 변수 지정 >
마무리
해당 프로젝트를 빌드하여 모바일 디바이스에서 확인해봅니다.