Published: May 6, 2022 by BeatChoi
GPS 좌표 입력
GPS 위치 데이터를 받아 좌표로 표현하는 방법을 알아봅니다.
스크립트 작성
GPSLocation 이라는 스크립트를 생성하고 아래와 같이 작성합니다.
1
2
3
4
5
6
7
8
9
10
11
12
13
14
15
16
17
18
19
20
21
22
23
24
25
26
27
28
29
30
31
32
33
34
35
36
37
38
39
40
41
42
43
44
45
46
47
48
49
50
51
52
53
54
55
56
57
58
59
60
61
62
63
64
65
66
67
68
69
70
71
72
73
74
75
76
77
78
79
80
using System.Collections;
using System.Collections.Generic;
using UnityEngine;
using UnityEngine.UI;

public class GPSLocation : MonoBehaviour
{
    public Text GPSStatus;
    public Text latitudeValue;
    public Text longitudeValue;
    public Text altitudeValue;
    public Text horizontalAccuracyValue;
    public Text timestampValue;

    public GameObject obj;
    // Start is called before the first frame update
    void Start()
    {
        StartCoroutine(GPSLoc());
    }

    IEnumerator GPSLoc()
    {

#if UNITY_EDITOR
// No permission handling needed in Editor
#elif UNITY_ANDROID
        if (!UnityEngine.Android.Permission.HasUserAuthorizedPermission(UnityEngine.Android.Permission.CoarseLocation)) {
            UnityEngine.Android.Permission.RequestUserPermission(UnityEngine.Android.Permission.CoarseLocation);
        }
#endif
        if (!Input.location.isEnabledByUser)
        {
            GPSStatus.text = "Not Enabled";
            yield break;
        }

        Input.location.Start();

        int maxWait = 20;
        while(Input.location.status == LocationServiceStatus.Initializing && maxWait > 0)
        {
            yield return new WaitForSeconds(1);
            maxWait--;
        }
        if(maxWait < 1)
        {
            GPSStatus.text = "Time Out";
            yield break;
        }
        if(Input.location.status == LocationServiceStatus.Failed)
        {
            GPSStatus.text = "Unable to determine device location";
            yield break;
        }
        else
        {
            GPSStatus.text = "Running";
            InvokeRepeating("UpdateGPSData", 0.5f, 1f);
            //access granted
        }
    }

    private void UpdateGPSData()
    {
        if(Input.location.status == LocationServiceStatus.Running)
        {
            GPSStatus.text = "Running";
            latitudeValue.text = Input.location.lastData.latitude.ToString();
            longitudeValue.text = Input.location.lastData.longitude.ToString();
            altitudeValue.text = Input.location.lastData.altitude.ToString();
            horizontalAccuracyValue.text = Input.location.lastData.horizontalAccuracy.ToString();
            timestampValue.text = Input.location.lastData.timestamp.ToString();
        }
        else
        {

        }
    }
}
28 : 안드로이드 디바이스에서 위지 서비스 이용 퍼미션을 받기위함.
32 : 디바이스에 위치 서비스가 작동하는지 체크.
38 : 위치 서비스 갱신을 시작함.
41 - 55 : 위치서비스 이용 불가 상황 사이드 케이스.
58 : GPS 위치 데이터 갱신.
63 : 위도, 경도, 고도 등 데이터 입력.
유니티 공식 문서에서 제공하는 스크립트를 기반으로 작성되었습니다.
https://docs.unity3d.com/ScriptReference/LocationService.Start.html를 참고하면 되겠습니다.
유니티 에디터에서
계층구조창에서 UI Canvas와 Text를 생성하고 다음과 같이 배치합니다.
GPS 위치 데이터를 받아서 표시할 항목은 좌측 Text 에서 보여집니다.
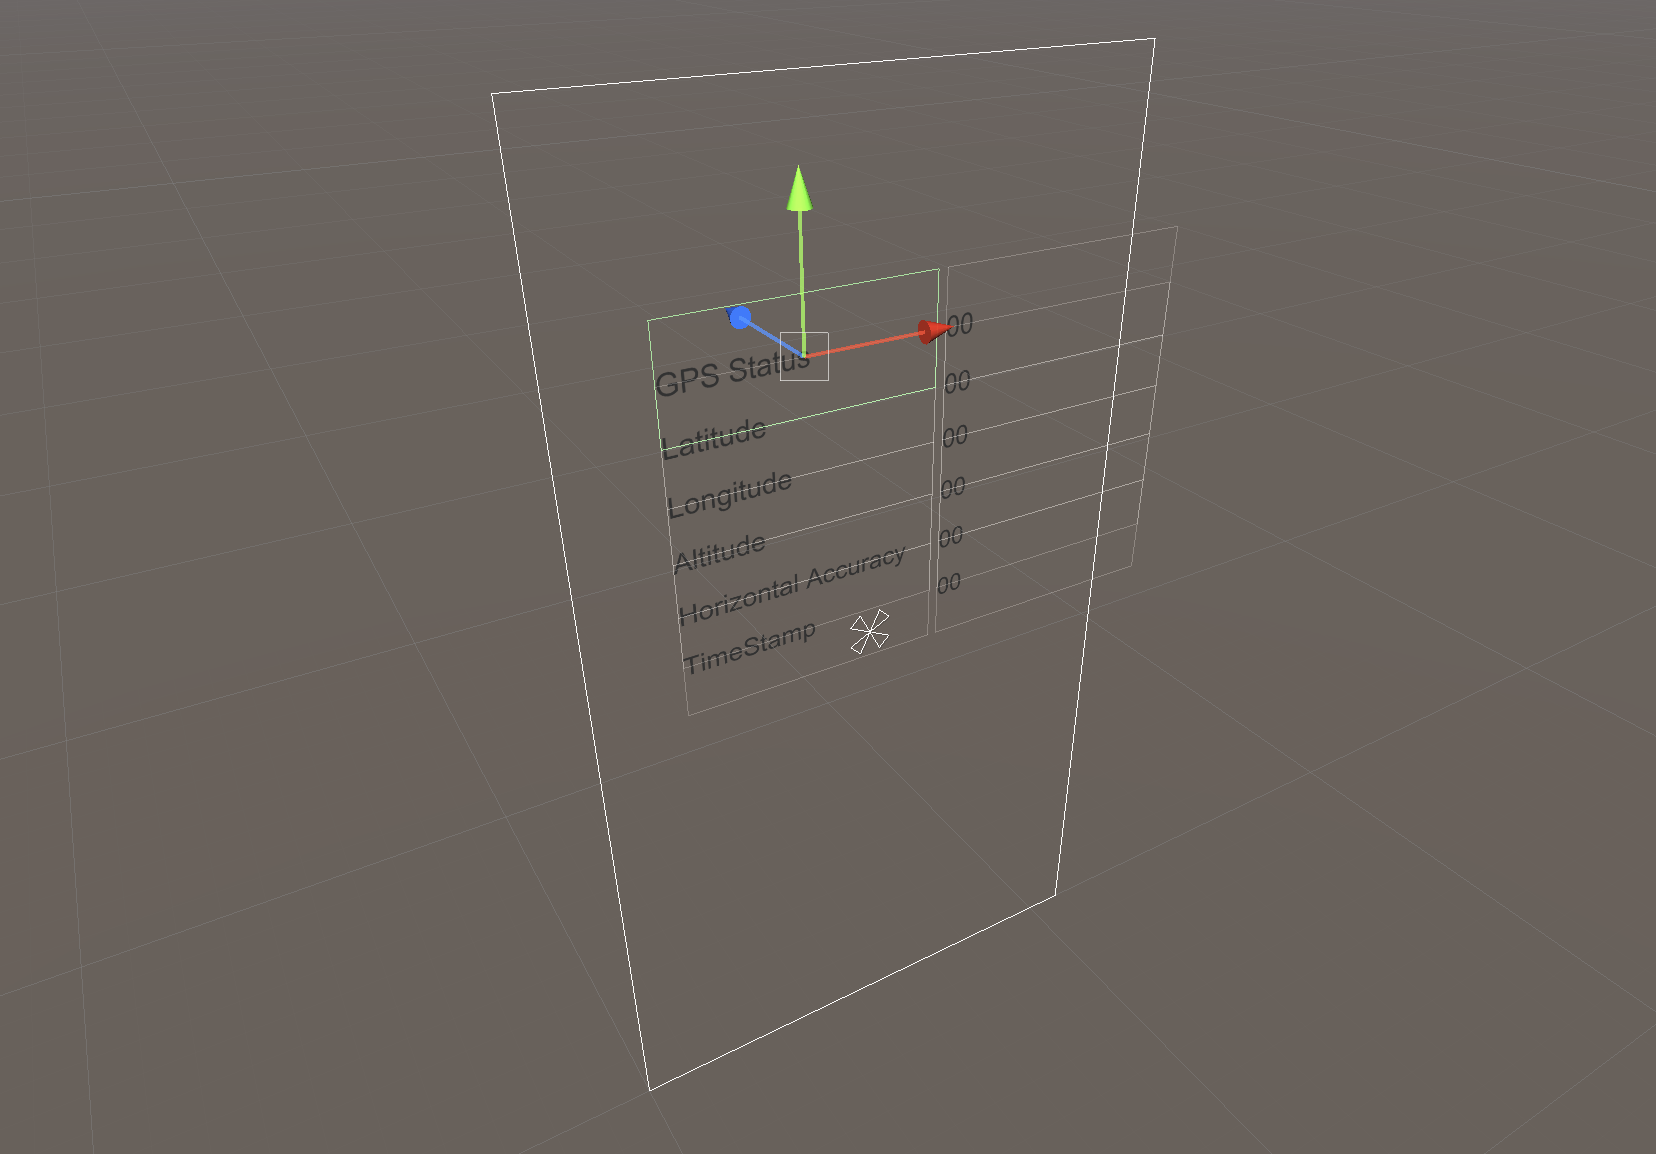
<01. UI Text 배치>
계층구조창에서 빈 게임 오브젝트를 생성하고 이름을 GPSLocation으로 변경합니다.
해당 오브젝트에 GPSLocation.cs스크립트를 연결하여 인스턴스화 시켜줍니다.
인스턴스화된 GPSLocation 컴포넌트에 변수항목들을 연결해줍니다.
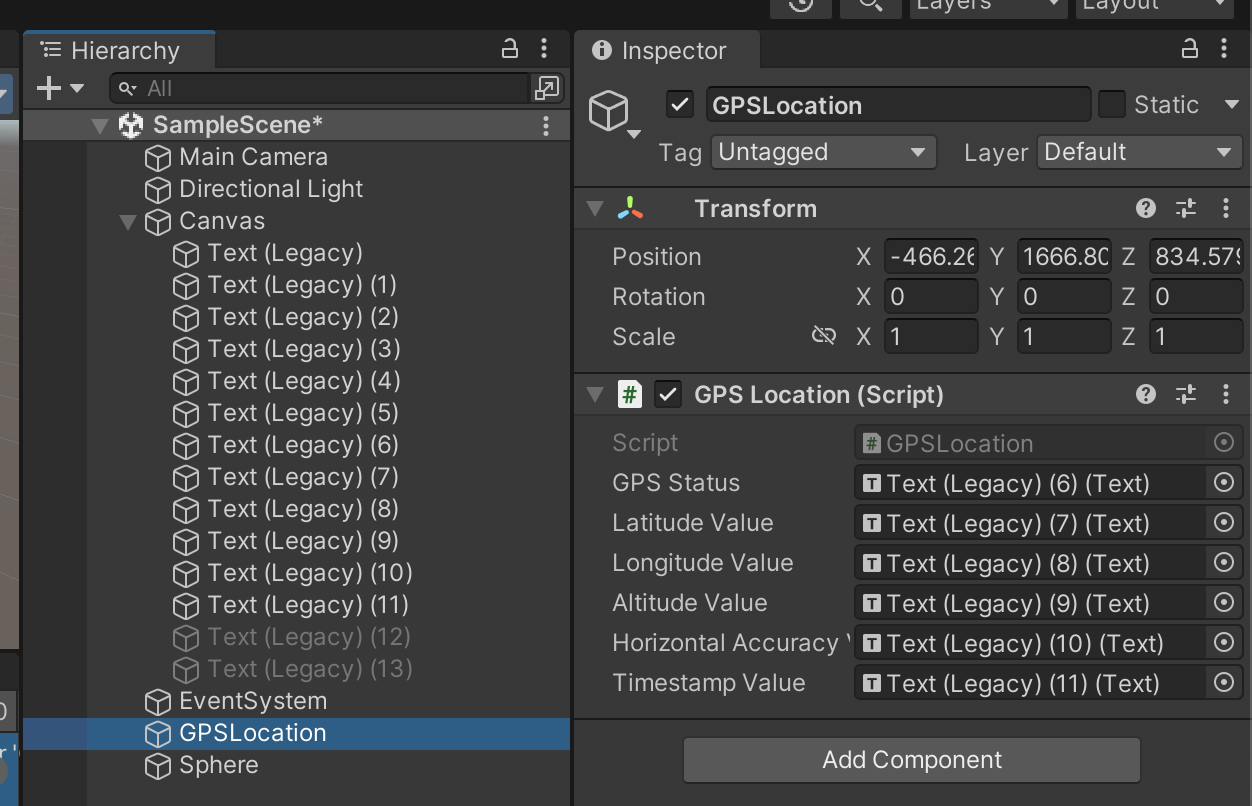
<02. Inspector>
빌드
모바일 디바이스에 빌드하여 현재 좌표가 입력되는지 확인합니다.